
If you tried to edit nude photography in Lightroom or Photoshop, you might have noticed that it somewhat differs from other types of editing. You have to spend more time retouching skin and body shape.
Many people feel conscious about their bodies if they aren’t used to participate in such photoshoots and will examine themselves more closely. Your job as a retoucher is to ensure all flaws on their bodies are removed, even if those are natural things like an unordinary knee shape.
Keep on reading our nude photography retouching guide and discover what you need to pay attention to when working with such photos.
1. Start by cropping the image
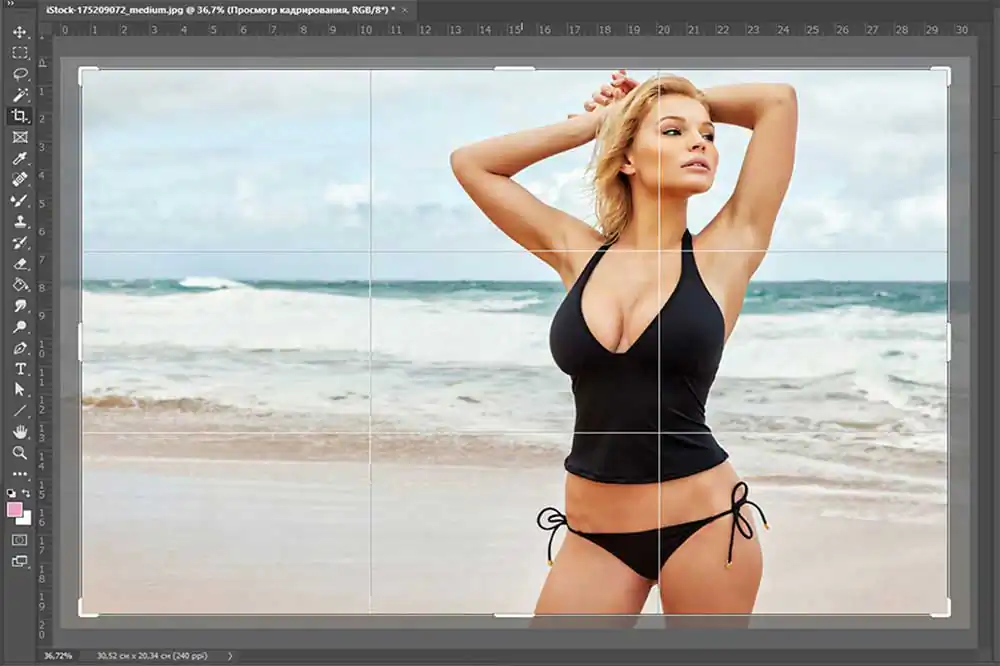
Cropping is necessary to make an image look beautiful, finished, and organic. Photos are typically cropped to remove unnecessary details, focus the viewer’s attention on the subject, and to fix the mistakes made during the photoshoot. Don’t be afraid of cropping during post-production, thinking that it will lower the image quality – you won’t do any harm if you crop the photo in RAW format.
Cropping the image at the middle of the model’s thigh usually gives more visually pleasing results than pictures cropped at knee-level. Here is an example of bad cropping:
If you crop a photo on the level of the model’s knees, waist, elbows, ankles, wrists, etc., it can make the person look very clumsy. Moreover, if you crop the legs or arms entirely, it will make the model appear square or visually larger than he/she is in real life.
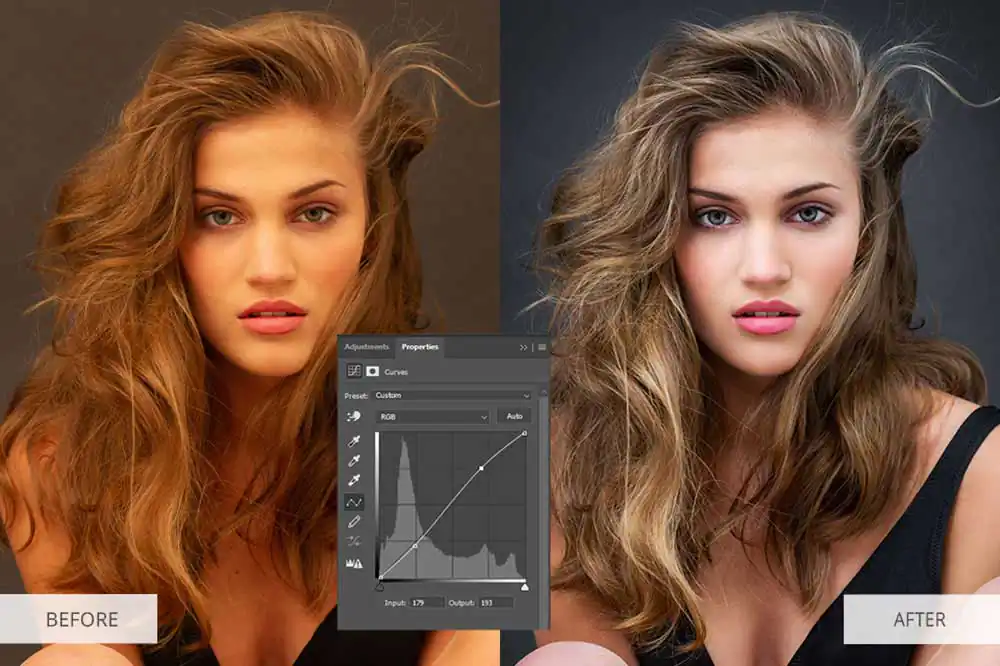
2. Adjust white balance
Before you move on to the next steps – adjust white balance and balance the colors. Working with white balance is easier in Lightroom thanks to the Eyedropper tool, or you can use the white balance slider and move it towards the needed side.
In Photoshop, you can do this with the help of curves and by choosing a white, grey, and black spot.
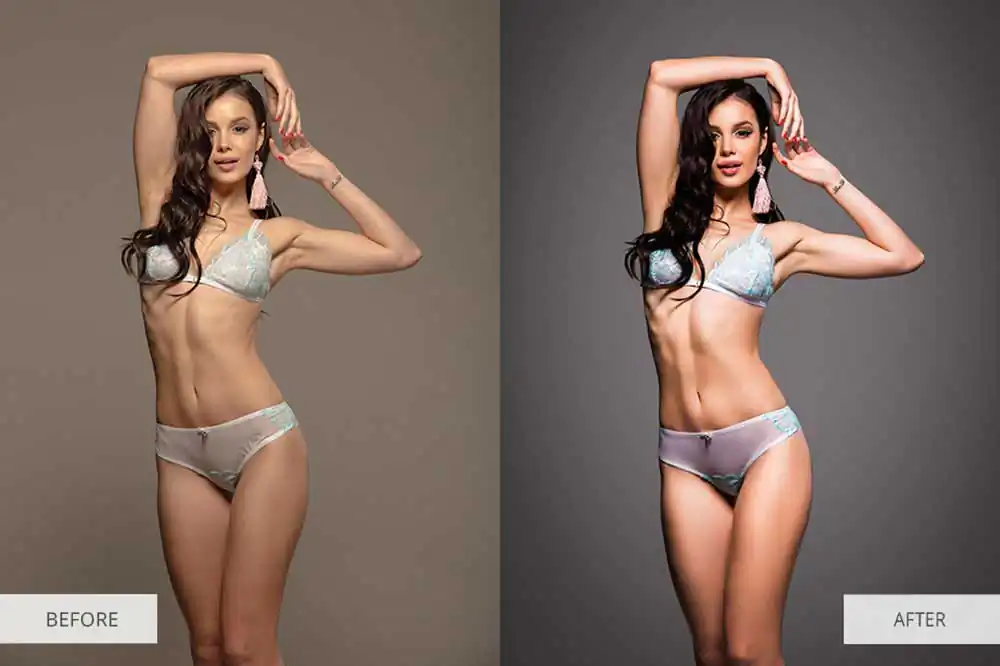
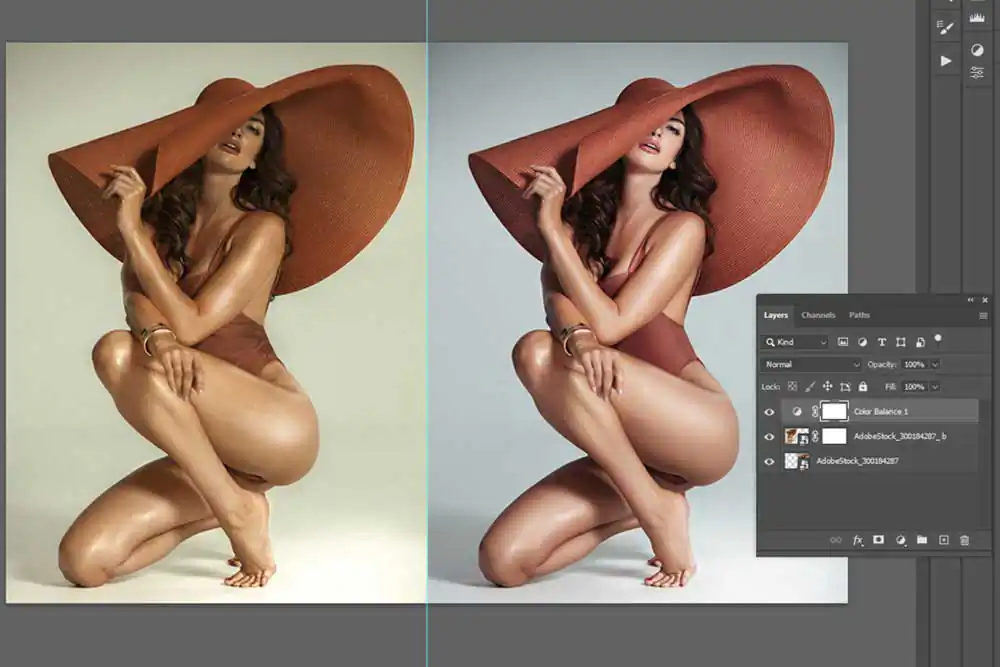
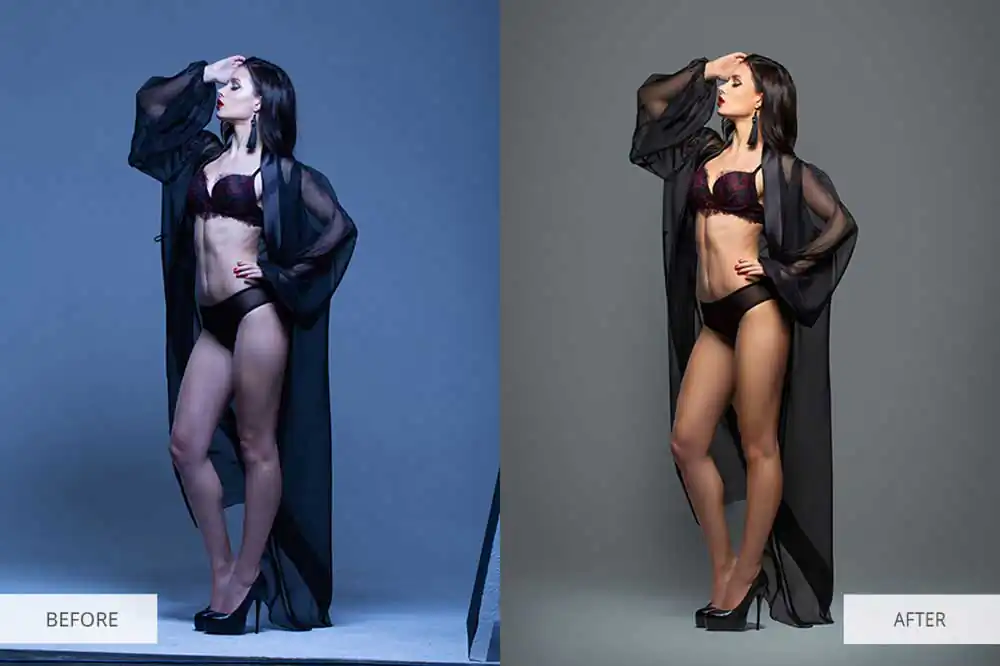
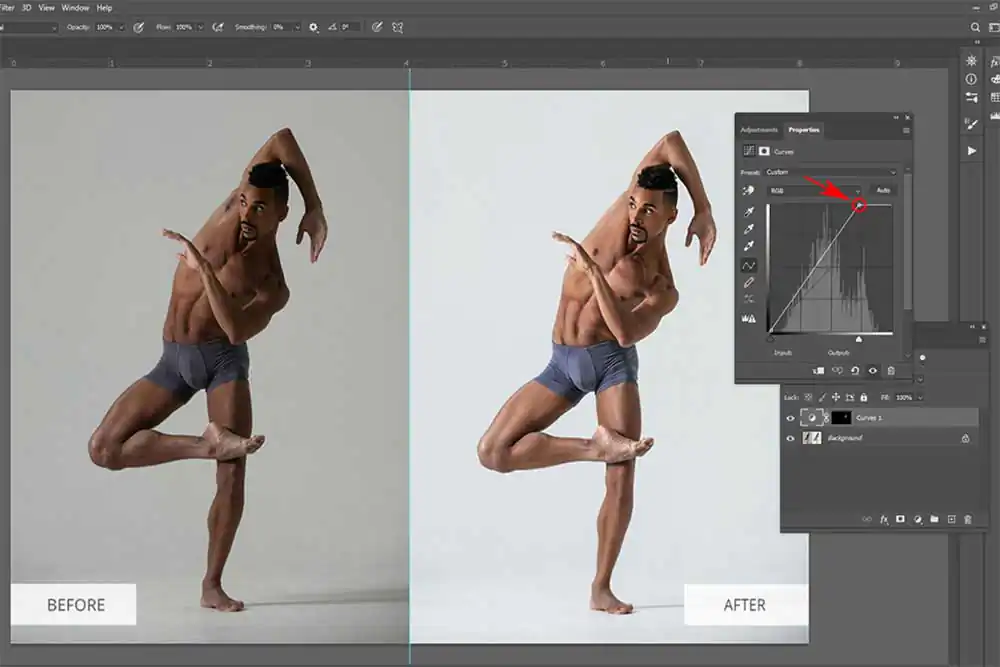
3. Perform basic color correction
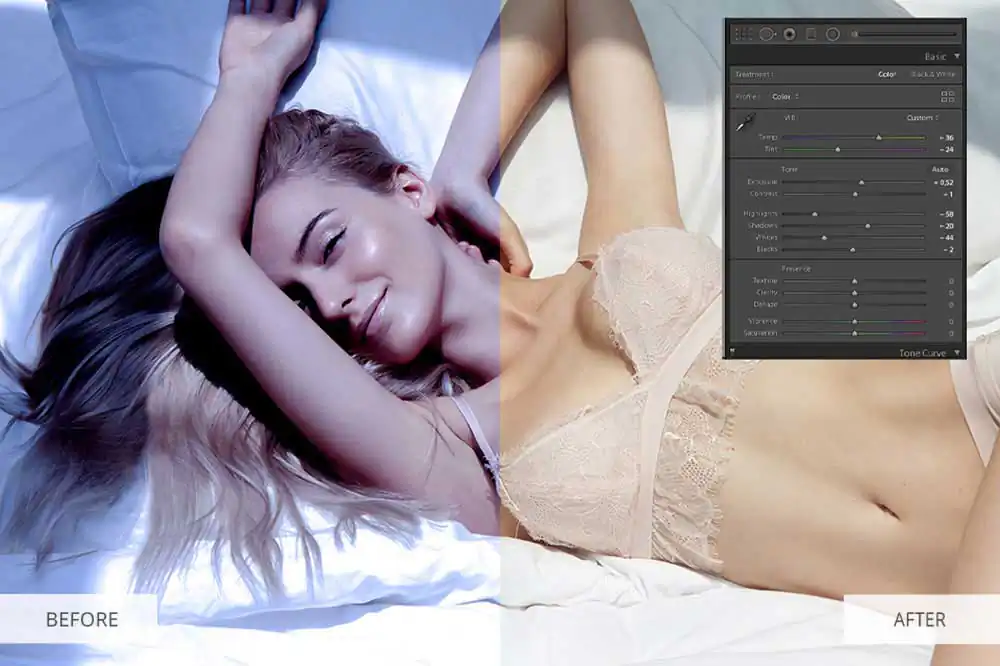
You have to adjust the brightness and saturation of a photograph if it looks too dim. Use appropriate sliders to increase the vibrancy and saturation. Don’t forget about the shadows and ensure they don’t go into blacks (unless that is part of the photo’s idea).
Set the clarity slider to preserve contrast and avoid having the image look flat. Remember that color correction mostly boils down to your preference and the emotions displayed in the photo, since color is one of the ways to display and highlight those emotions.
4. Use presets and plugins
If you’re using Lightroom to perform the color correction of your photos, you can apply presets for a more creative editing approach, which is particularly relevant if you’re shooting Fine Art Nude Photography (Fine Art Nude Photography Tips). This genre gives you more flexibility in terms of color since here you can try out extraordinary color solutions – black-and-white with a single highlighted color, deep shadows on the entire body, strong overexposure, etc.
However, don’t go too far with creative retouching unless specifically requested by your client.
5. Try using gradients
The gradient tool has to be used sparingly when you edit nude photos since it tends to look rather overbearing and can change the entire atmosphere. Nonetheless, you should try it anyway since a gradient can add a spark to your images, especially ones that don’t have a strong visual anchor.
When used properly, gradients can look refreshing and memorable. Remember to change the gradient layer transparency by about 20%-30% to create a subtle, magical effect.
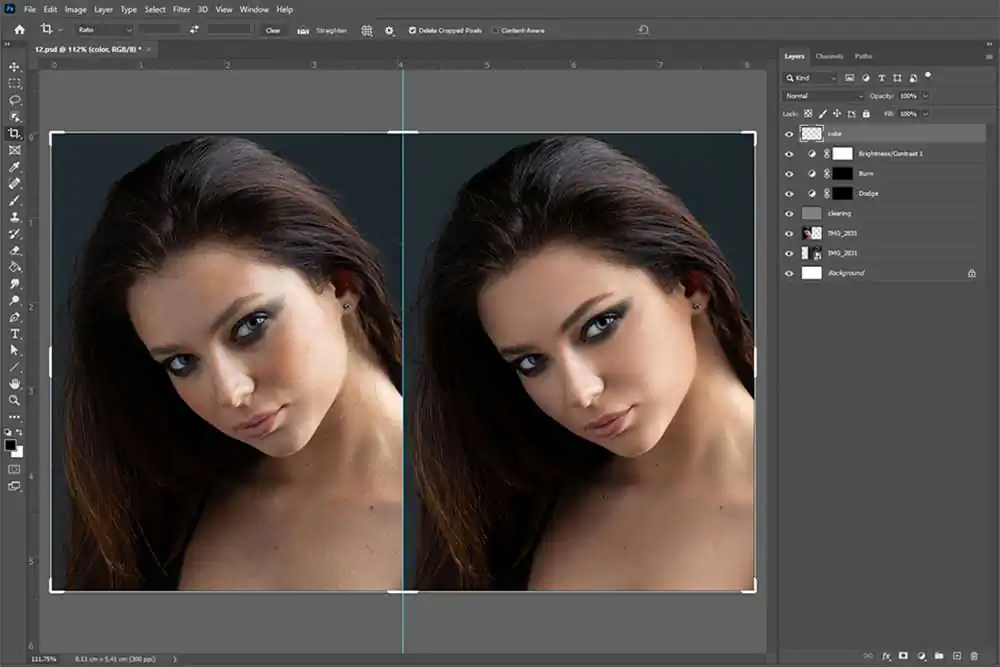
6. Make the eyes brighter
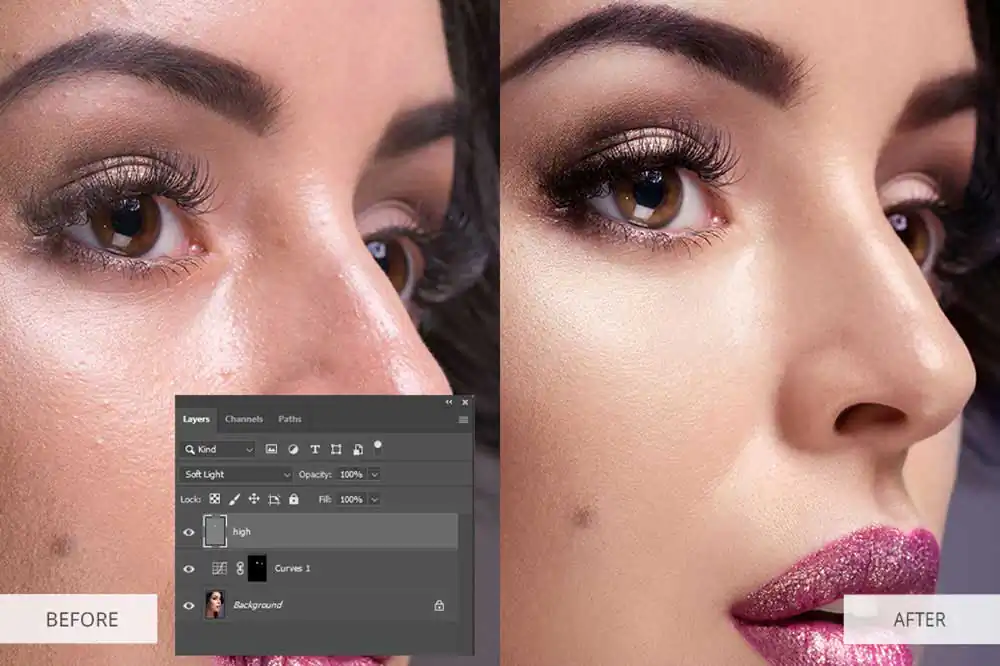
Even in such a special genre as nude photography, eyes remain the most important part of your image. If they are featured in the photo, the eyes will attract the viewer’s attention as much as anything else will.
To make the eyes stand out more, you can strengthen the color and contrast of the iris. You can also make the whites of the eyes clearer and whiter. Finally, you can increase the sharpness to make the eyes brighter and more attractive.
Start by brightening the eyes:
1. Create a Curves Adjustment Layer by choosing Layer > New Adjustment Layer > Curves.
2. Change the blend mode of the created layer to “Color Dodge” and paint the mask completely black.
3. Select the Brush Tool (B) and change the opacity to “10%.” Apply it carefully on the catchlights in the eyes to enhance them. Next, draw on the eye’s retina next to the iris.
Then, make them more contrast:
1. Make a second Curves Adjustment Layer and pick the “Color Burn” blend mode, paint the mask black.
2. Draw on the eye’s edges to make them appear rounder and draw a bit around the iris to make it stand out from the retina a tad more.
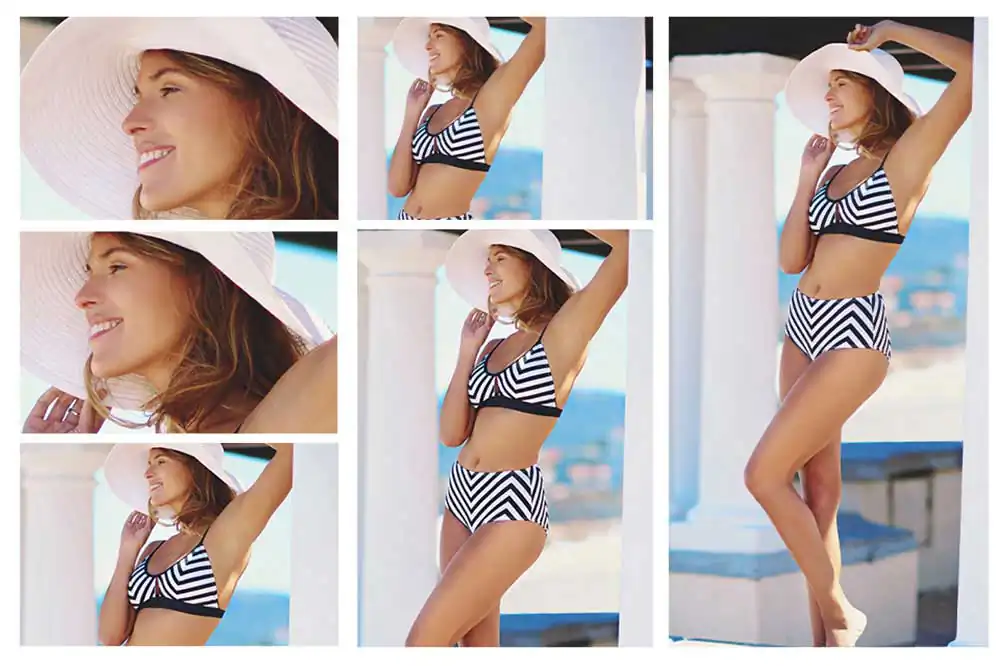
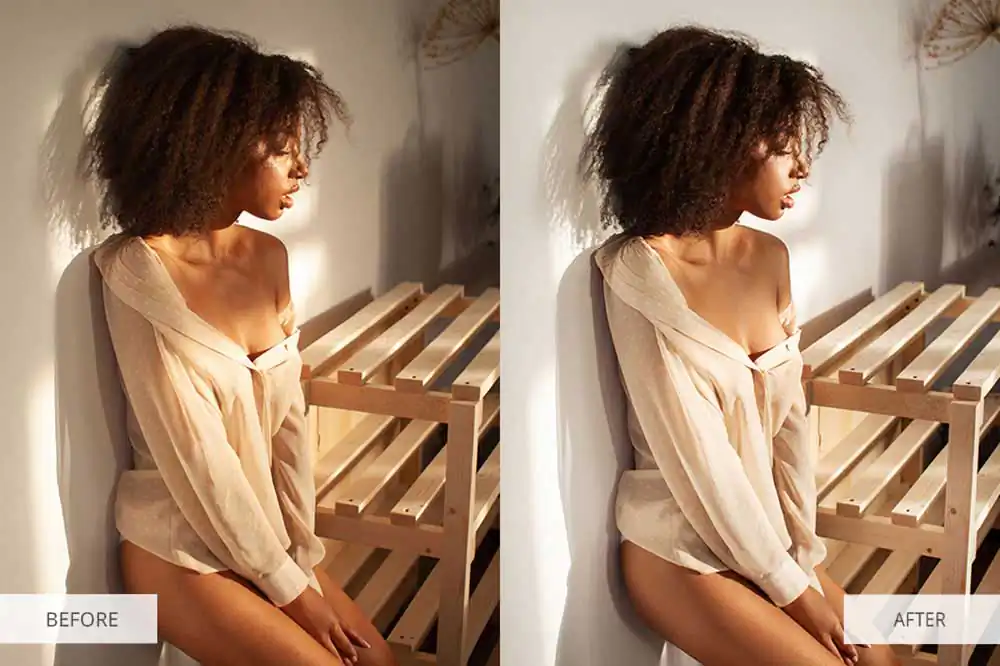
7. Work on skin flaws
Alt: work on skin flaws in nude photography
Zoom in to get a better look at the skin. Even if the model’s skin and figure are perfect, there’s always something you can improve. The uneven skin tone across the entire body, scars, stretch marks, unwanted birthmarks, etc. – you have to fix all of that. Besides, you refer to the online photo editing service that can do professional skin airbrushing at a moderate price.
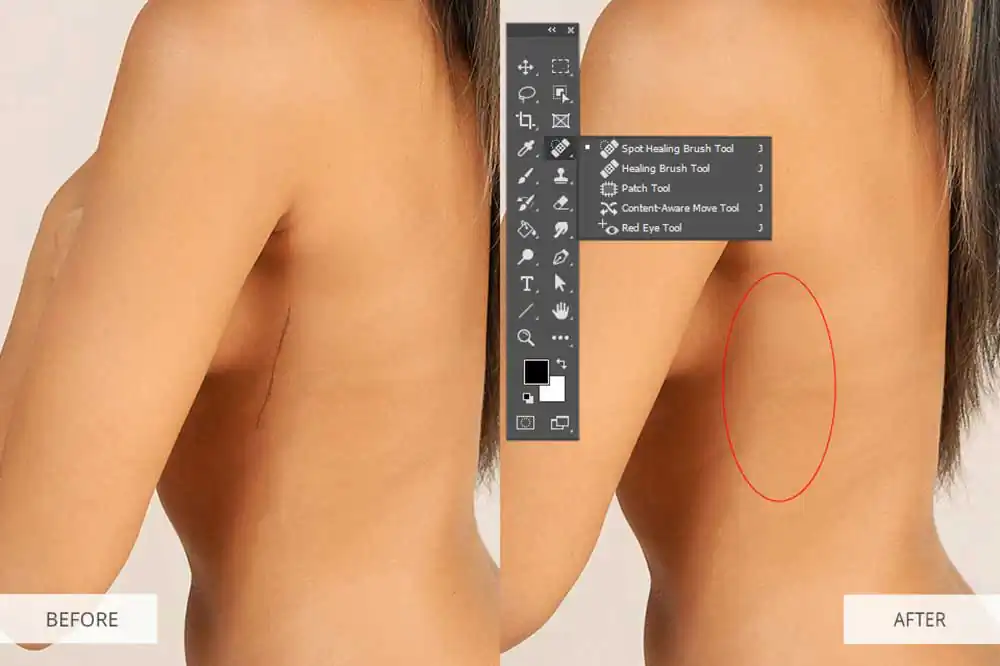
Start by removing all small flaws from the skin with the help of either the “Stamp” or “Healing Brush” tool, while simultaneously deleting stray hairs. The next step is to use frequency separation to improve the skin color without destroying its texture.
A follow-up action you can take to edit nude photos is to balance the skin tones and colors. In most cases, the face and body have different colors, so to ensure the photo looks great it’s best to balance them. In Photoshop, you can do that with the help of levels, masking a group layer, or using the tone/saturation sliders.
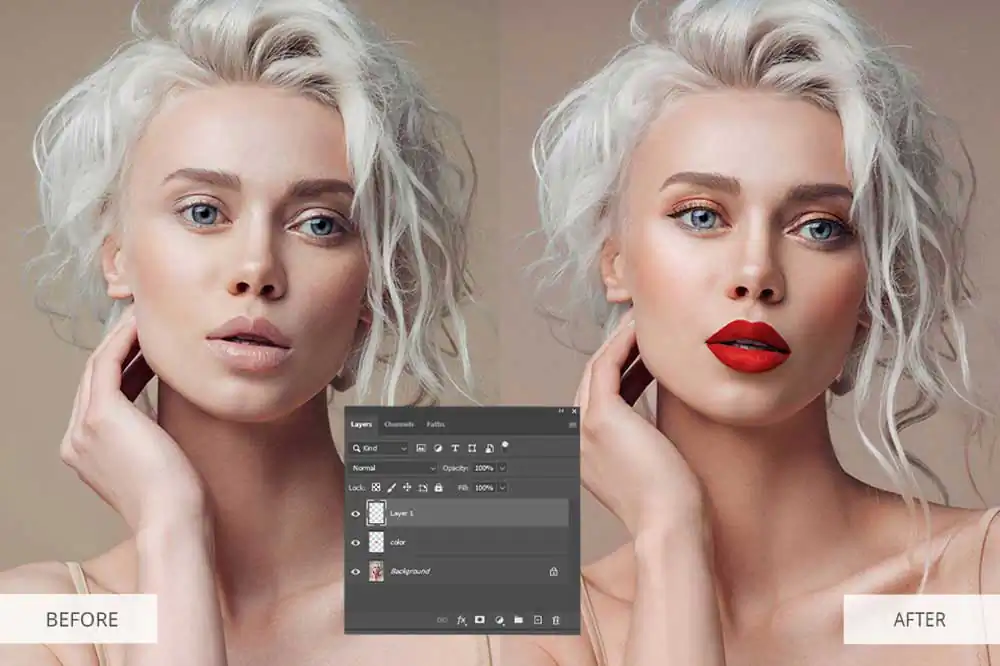
8. Don’t forget about the lips
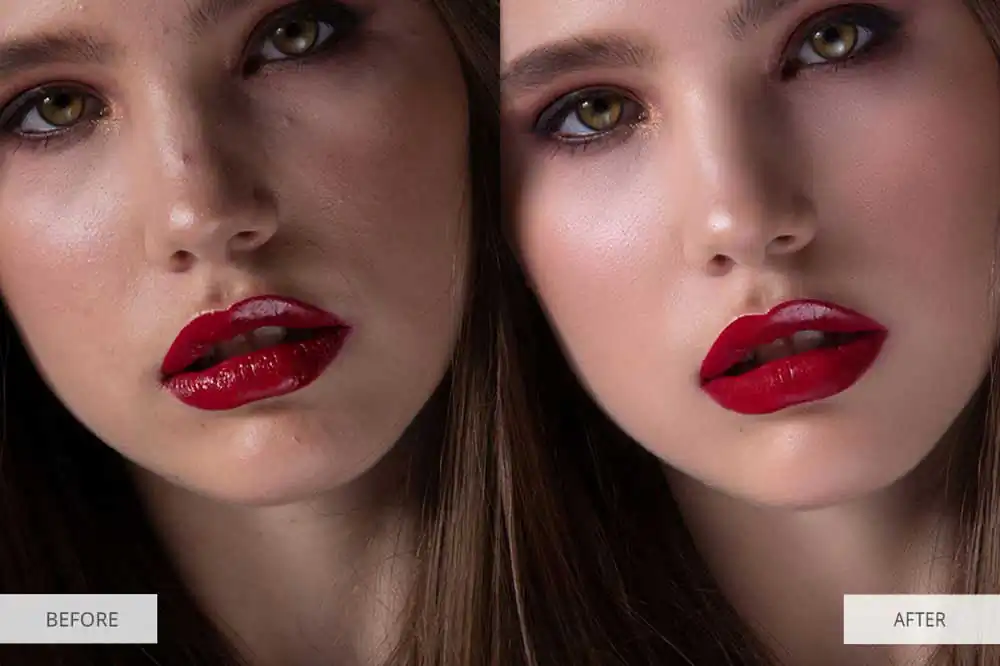
When it comes to nude portraits, lips play as important a role as eyes do, which is why they can ruin the image if they look dry, chapped, or don’t stand out enough. You have to know how to fix such problems.
If you’ve noticed a color problem, you can create a hue/saturation adjustment layer and strengthen the colors. If the problem is tied to lip dryness, employ the Spot Healing Brush and apply the Dodge and Burn Tool to introduce a bit of glare.
9. Play around with layer masks
Layer masks are another important tool that needs to be in the arsenal of every advanced retoucher. When you’re toning or editing a photo, you often don’t want to apply the effect globally. Thankfully, you can tone and edit only selected parts of the image, if you know how to use layer masks.
When performing nude editing, it can be beneficial to use layer masks with a corrective hue/saturation layer to edit all body parts separately. Create a mask for each body part of a different color and balance their hues to receive the perfect skin tone on the final image.
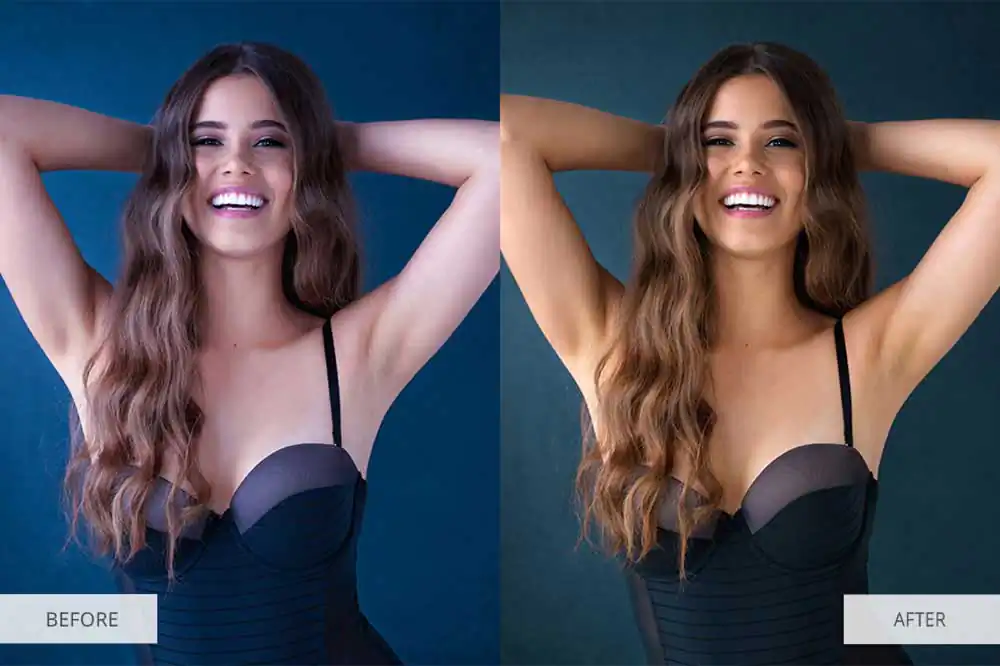
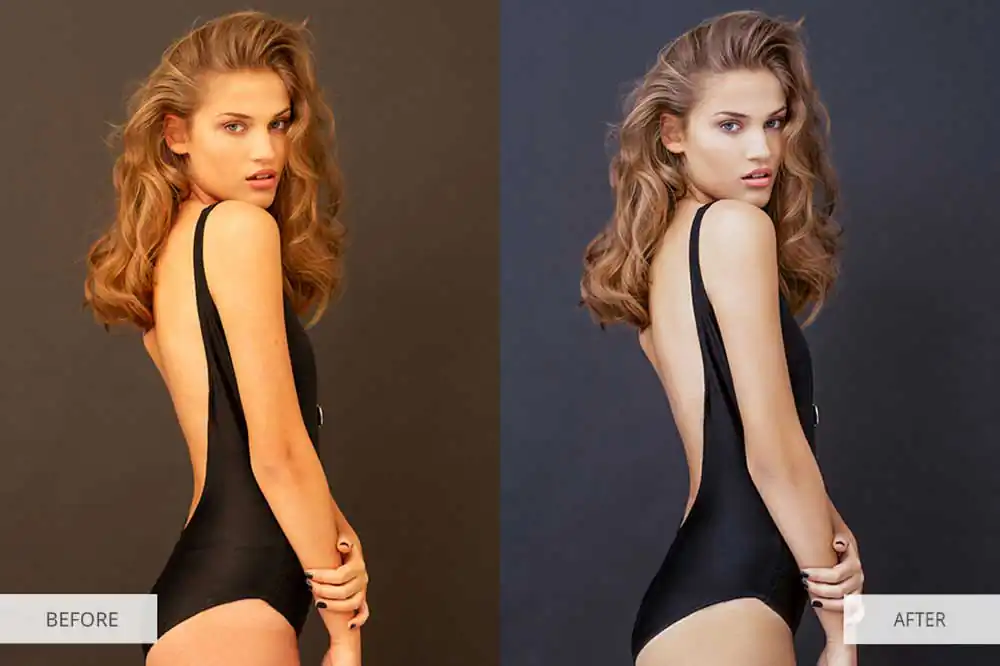
10. Strengthen colors with Vibrance to maintain natural skin tones
In Lightroom, you can use the Vibrance slider to strengthen the dimmest colors without boosting the tones that already have high saturation. If all the colors in your image are too dull, you can use the Saturation slider instead to boost all colors of the photo.
Pushing saturation too far is a common mistake among amateur retouchers that tend to create a flashy mess of a photo. If the skin tone is oversaturated, the model will probably look jaundiced. All image parts will try to be the center of attention, which isn’t something you want.
It’s fine to use color as a tool to focus the viewer’s attention on something, but it can be very easy to overdo it, hence why it’s recommended to rely on Vibrance instead. The latter is especially great at recovering colors from shadows, which are usually dull because of underexposure.
11. Increase the hair color saturation
Once you’re done retouching the hair, don’t forget to work on its color. Flash can often reduce color saturation, while a dark background can make it overly dull. You can increase the saturation in one of two ways:
In Lightroom, select the Adjustment Brush, set it to increase Saturation, and, if needed, Contrast, then apply it to the hair. If the effect turned out to be too strong, you can weaken it by tweaking the sliders in the settings.
If you need to highlight the hair in Photoshop, here is what you can do:
- Press the Q key to enter the “Quick Mask” mode, and then select the hair with the help of the Brush Tool.
- Invert the selection using the Shift+Ctrl+I key combination.
- Go to Layer> New Adjustment Layer > Hue/Saturation.
- Set the sliders to make the color more pronounced.
Be careful not to change the hair color completely unless it was your task. Simply highlight the natural color of the model
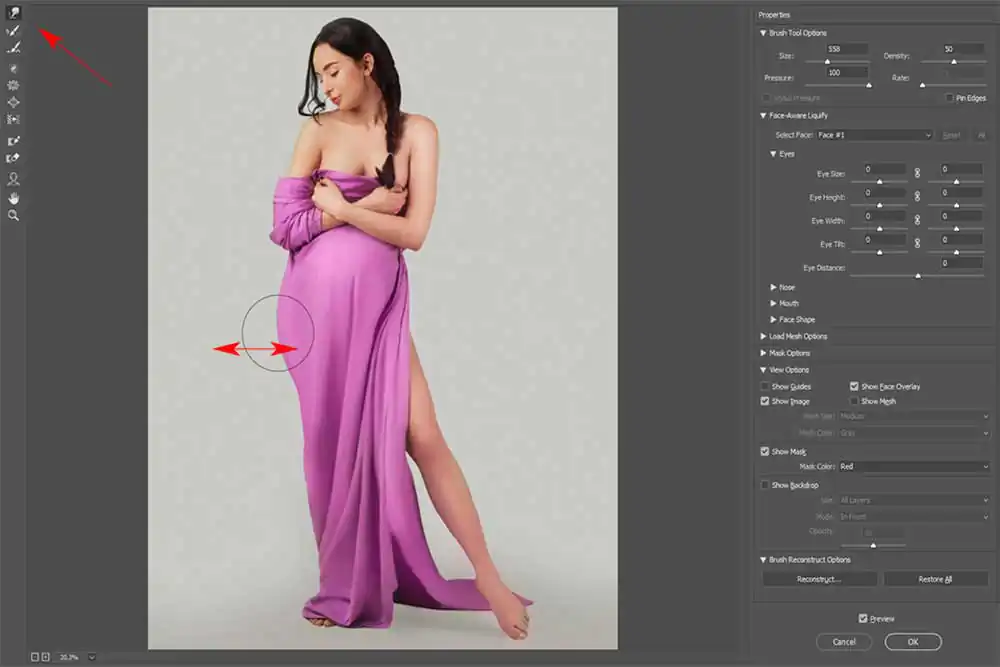
12. Change the body’s shape
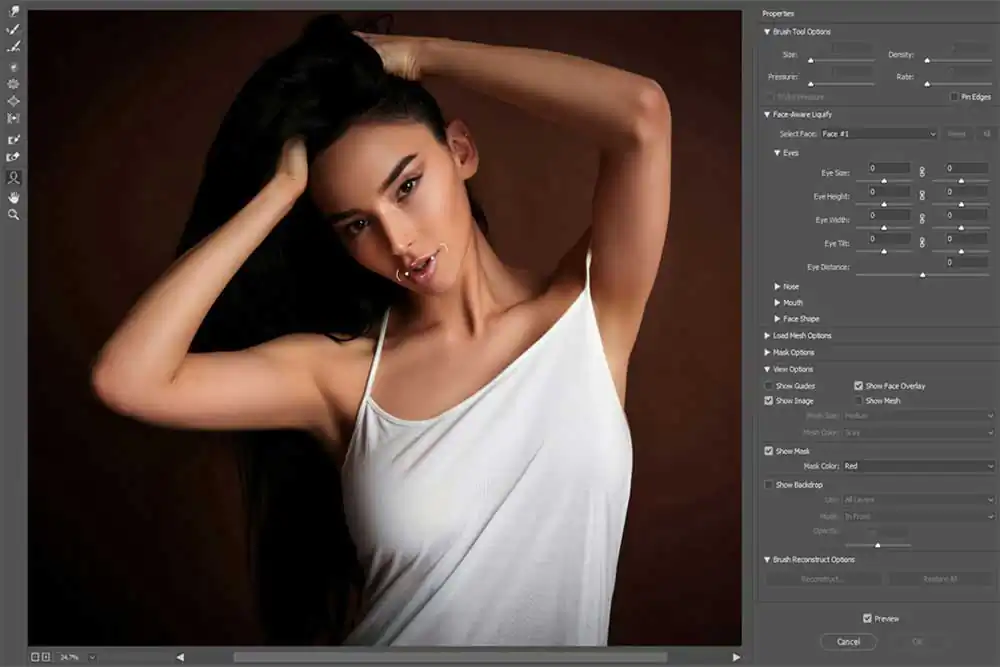
Adjusting the body shape is one of the most important things you have to do when you need to Photoshop nude photos. This task has to be approached with maximum care since a single changed detail can dramatically alter the final image.
In Ps, you can use the duplicate option and select filer-liquify to locate and fix problematic parts by making them smoother. Know when enough is enough so you don’t change the model’s body too much.
To start changing the body’s shape, you need to go to Filter – Liquify. It’s recommended to create a separate layer for this task to avoid ruining the original image.
If the camera distorted the face (which can happen if the photographer used a wide-angle lens), then you can use the Face-Aware Liquify option to fix the distortions, but don’t change the facial features. The body parts that need to be made slightly smaller or larger can be changed with the help of the Forward Warp and Push Left tools.
13. Employ the Liquify Tool to add volume to fabric
The Liquify Tool can be used not only for changing the body but different fabrics as well. Obviously, there isn’t a lot of clothing involved in nude photography, but the models can often be covered by a piece of fabric, formless clothing, which can look unflattering in the shot.
You can perform any kinds of Liquify manipulations you want, including mirroring, pushing, stretching, rotating, and bloating. While doing so, keep the natural shadows and lighting in mind to make the image as realistic as possible.
14. Make the body more eye-catching with the help of Dodge & Burn
If a photo looks too flat, you can deal with that issue and add more dimension to it by brightening specific highlights and dimming specific shadows. You can highlight the muscles on the body, strengthen the shadows or highlight the parts you want the viewer to pay the most attention to.
However, keep in mind that there are several rules you need to follow if you want to use the Dodge & Burn tool properly:
1. Spreading light across the body – you need to understand how light falls onto different shapes and the properties of hard and soft lighting in photography. If you lack that understanding, you might accidentally remove volume where it’s needed or add it to unnecessary places.
2. Understanding the basics of light and shadow in visual arts – with this knowledge you can successfully correct shapes, applying new and/or replacing existing highlights and shadows.
3. Knowing the current trends in the make-up industry will help you make the right decisions when performing global brightening and darkening (also known as “sculpting and contouring), as well as general beauty retouching.
15. Work on the make-up
No, it’s not about creating make-up where there was none in the first place. Such manipulations rarely look realistic while demanding a ton of time. Instead, you should focus on highlighting the existing make-up by making it more pronounced, highlighting the most attractive features, and fixing the outlines where needed.
Start with the eyebrows – remove stray hairs on the sides, make them more even and tidier if needed. Using the Dodge & Burn technique, darken the eyelashes and add shade to the jaws, also don’t forget about the lips and the eyes – they need to be made a bit brighter. Remember to follow the main rule of beauty retouching when you edit nude photos – don’t overdo it.
16. Remove all unnecessary details and objects
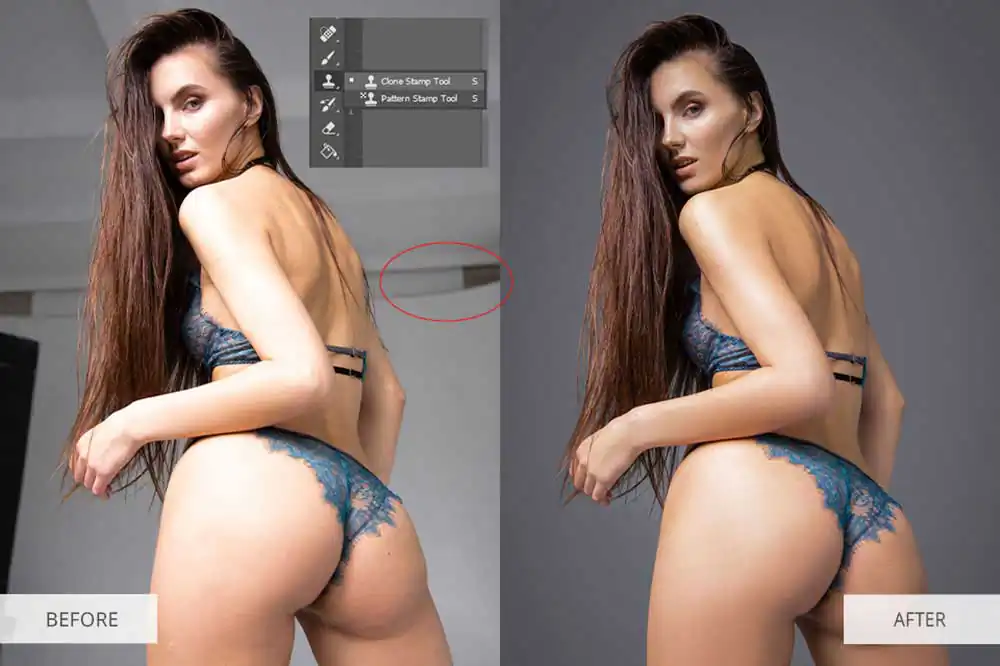
During a photoshoot, the photographer doesn’t always have the opportunity to remove all needless objects from the shot, or sometimes they simply don’t notice them because of how engaged they are in their work.
You can freely delete all unwanted objects that made it into the frame. However, I don’t suggest removing absolutely everything from the shot since then you can make the background feel too empty, which isn’t always beneficial. When removing large objects, don’t forget about the shadows they cast – those need to be deleted as well.
For this step, your go-to tools should be the Clone Stamp Tool, Patch Tool, and Content-Aware Fill. They are great at dealing with distracting factors regardless of their size or shape.